
 Sign In
 Create Account
Register now to gain access to all of our features. Once registered and logged in, you will be able to create topics, post replies to existing threads, give reputation to your fellow members, get your own private messenger, post status updates, manage your profile and so much more. If you already have an account, login here - otherwise create an account for free today!

No Disintegrations - Decisions, Decisions, Decisons: Part 1
No Disintegrations - Decisions, Decisions, Decisions: Part 1
Welcome back one and all to another week of No Disintegrations. This week I wanted to expand on the discussion from last week about deck building but with a focus on the decisions we make when building a deck and how they translate into decisions made while playing the decks. There are many times when the decisions we make as gamers can either effect us positively or negatively. From the start of deck building all the way to the last card we play to win a world championship there are countless decisions that can affect us. How though can we use these decision points (thanks TinyGrimes for that catchy term) to our advantage and is there a way to affect our opponents as well?
I have planned this to be a two part article, the first portion we are going to work through the decisions for making two decks and the second portion will go through how the decisions made in deck building change and alter the decisions made when playing the decks. So on to the interesting bits!!
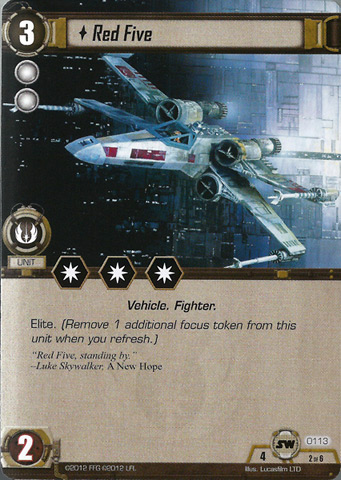
On the flip side of this we have proactive decks that are almost a complete mirror. More often than not these type of decks fall into the Aggro or Mid-Range category and attempt to flood the board with more threats than their opponent is able to handle. Red Five (4-2) is a superb example of a proactive card, when it hits the field your opponent either has to deal with it quickly or it will take over a game, ending it very quickly. A proactive style deck forces most of the decisions points on to your opponent, pretty much every turn you know you will be playing units and attacking with those units and it will be up to your opponent to find a way to deal with the onslaught. A times while playing a deck like this it will appear that you are not in control of the game or that you are blindly attacking, the key though is that you know your deck and you know what your plan is down to its finest point. You are using this appearance of recklessness to mess with your opponent, trying to force them to make the wrong decisions and wind up making a mistake they cannot recover from.
There are many other more subtle points to both of these types of decks, as a player becomes increasingly familiar with a card game they will find minor tweaks to these broad stroke ideas and be able to fine tune them to fit their play style. With these two categories in mind let's build two decks that demonstrate how these strategies play out.
Note: The following decks were made for the purpose of showing two deck building principles, thus they may seem a bit wacky and may not "work" to a top tier potential.
With all that being said we are first going to tackle a Light side deck that is very proactive. Also we are going to use it to demonstrate a few ways to force poor decisions on to your opponent by some key card selections when building the deck. Some of the key cards I want to highlight in the deck are Red Five (4-2), Wedge Antilles (38-2), and Battlefield Engineers (9-3). These three cards work amazingly well together and force your opponent into some very bad situations. Also the addition of Admiral Ackbar (12-2), Heavy Blaster Emplacement (9-5), and Rebel Assault (8-6) put even more pressure on your opponents decision making because every turn you can just keep coming at them in a relentless wave. Once I figured out the base core for the deck I came up with the following:
Afflilation:
Jedi (Core Jedi)
Total Objective Sets: 10
2x A Journey to Dagobah (4-1)
Red Five (4-2)
R2-D2 (4-3)
Twi'lek Loyalist (4-4)
Double Strike (4-5)
Target of Opportunity (4-6)
Red Two (8-2)
Y-Wing (8-3)
Astromech Droid Upgrade (8-4)
Hidden Outpost (8-5)
Rebel Assault (8-6)
Mon Mothma (9-2)
Battlefield Engineers (9-3)
A-Wing (9-4)
Heavy Blaster Emplacement (9-5)
Heat of Battle (9-6)
Admiral Ackbar (12-2)
X-Wing Escort (12-3)
X-Wing (12-4)
Fleet Command Center (12-5)
Heroic Sacrifice (12-6)
Wedge Antilles (38-2)
Rogue Three (38-3)
Snowspeeder (38-4)
Hoth Survival Gear (38-5)
Target of Opportunity (38-6)
As you will see this deck has some very explosive potential at a low cost curve. Having your most expensive unit cost three resources means that you should be able to play multiple units per turn allowing you to quickly overrun your opponent. Also you have quite a bit of interaction among all of your cards, especially with Battlefield Engineers that allow you to attack multiple times with a vehicle enhanced by Wedge Antilles or to keep pinging away with Heavy Blaster Emplacement. One of the key points I really like about Heavy Blaster Emplacement is that it forces your opponent to choose where to assign the damage. While this may seem like a drawback it can actually work as a tell, giving you potential information about what they are playing or what they are expecting you to do. Since you are also running Admiral Ackbar, Rebel Assault, and Heat of Battle (9-6) it adds to the stress of their decision because if they choose poorly you have ways to make them pay. Speaking of Admiral Ackbar, since he can be played during any engagement that means that as long as you have three resources open your opponent is never truly safe as you could stifle their entire turn with the well timed trap. You will have your opponent scratching their head wondering what is coming next and sweating out every decision they make knowing that their downfall could be only one card away.
When I was thinking up a dark side deck I knew that I wanted to build a control deck, this meant I had to have multiple ways to deal with not only units but pesky enemy objectives as well. This meant running Force Lightning (23-5) and Superlaser Blast (28-6), both of which are very good cards but rather expensive. Fortunately both objectives come with resource producing units or enhancements. One of my favorite objective sets is Cruel Interrogations (24-1), card advantage is key to control decks and Interrogation Droid (24-2) and Interrogation (24-6) are great tools to get and then maintain card advantage. Interrogation also gives you the advantage of knowing what is in your opponents hand so that it is harder to get surprised by a card you were not expecting. One of the new stars of the Desolation of Hoth force pack is Icetromper (40-2), not only does it let you remove an attacking non-vehicle unit from an engagement but it also deals 1 damage to that unit. What this deck lacks in destructive power it more than makes up for in being able to slow and eventually shut down your opponent.
Afflilation:
Imperial Navy (Core Imperial Navy)
Total Objective Sets: 10
2x The Emperor's Web (23-1)
Emperor Palpatine (23-2)
Emperor's Royal Guard (23-3)
Sith Library (23-4)
Force Lightning (23-5)
Force Choke (23-6)
Interrogation Droid (24-2)
Interrogation Droid (24-3)
ISB Interrogators (24-4)
Intimidated (24-5)
Interrogation (24-6)
Grand Moff Tarkin (28-2)
Superlaser Engineer (28-3)
Stormtrooper Elite (28-4)
Control Room (28-5)
Superlaser Blast (28-6)
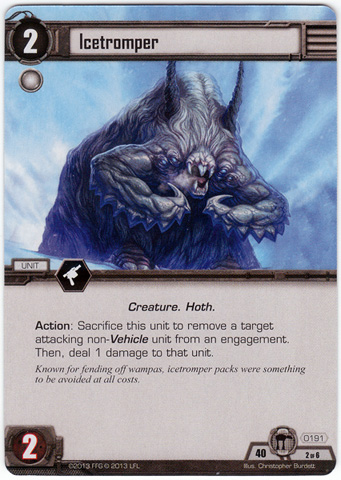
Icetromper (40-2)
Icetromper (40-3)
Fear (40-4)
The Desolation of Hoth (40-5)
Twist of Fate (40-6)
Darth Vader (41-2)
Communications Officer (41-3)
Probe Droid (41-4)
Probe Droid (41-5)
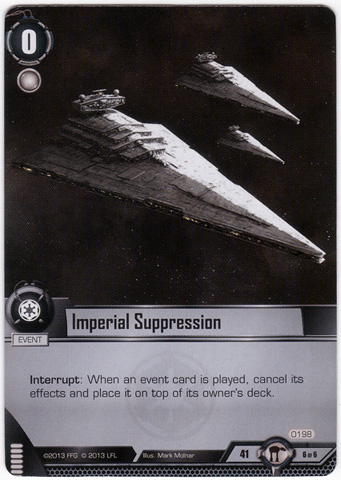
Imperial Suppression (41-6)
The deck has quite a few ways to shut down your opponent, between Emperor Palpatine (23-2) and Intimidated (24-5) you should be able to rack up the focus tokens on your opponents characters. Also being able to hold an Imperial Suppression (41-6) in hand to counter a pesky Event card and then follow that up with an Interrogation on your opponents turn to strip the card from them can be back breaking. One of the surprising and more interesting interactions in the deck is The Killing Cold (40-1) in combination with Probe Droid (41-4). You can throw Probe Droid in a battle and if it looks like you will lose him to unit damage you can sacrifice him to clear damage off a Hoth objective you control and deal 1 damage from his ability to an objective your opponent controls. Last but not least is another star of the deck in Fear (40-4). Being able to remove a unit completely from the force struggle means that the majority of the time Emperor Palpatine can hold the force for you on his own.
Now that we have two decks ready, next week we will go over how these two decks force your opponent into poor decisions and how you can use that against them. Also we will look at some of the smaller things you can do; intentionally or unintentionally, during a game that can either increase or decrease your chances of success. As always thank you to every for tuning in for No Disintegrations and I look forward to any comments you may have on this article.
- Etherrider, leizeQ and Ketricel like this


2 Comments
Fantastic article on the basics of deckbuilding. I hadn't seen the probe droid/killing cold interaction. I just might und up using that.