
 Sign In
 Create Account
Welcome to Card Game DB
Register now to gain access to all of our features. Once registered and logged in, you will be able to create topics, post replies to existing threads, give reputation to your fellow members, get your own private messenger, post status updates, manage your profile and so much more. If you already have an account, login here - otherwise create an account for free today!
Register now to gain access to all of our features. Once registered and logged in, you will be able to create topics, post replies to existing threads, give reputation to your fellow members, get your own private messenger, post status updates, manage your profile and so much more. If you already have an account, login here - otherwise create an account for free today!

SWLCG "The Search for Skywalker" Force Pack Review
Jun 29 2017 12:00 AM |
Majestaat
in Star Wars
Star Wars LCG Community Review THE RATING SYSTEM:
We'll only be rating the pods as a whole in these series. No in-depth analysis on the individual cards, as everyone already has an established opinion on them and it would take more time than what we can afford. Sorry to disappoint.
While the following isn't particularly precise, the different scores could be seen as:
1 - Poor - Probably a combination of subpar cards, low edge and lack of synergy. Should prove to be a weak addition to a deck even when building around it.
2 - Bad - Overall a weaker pod that can have its moment when properly supported, but usually stays within the realm of "just fun".
3 - Average - A fair choice that is simply outclassed by other options in most cases. May prove to be the superior pick in very particular decks.
4 - Good - All-around solid and can most likely pull its weight by itself.
5 - Great - Cohesive set with with several strong elements which can fit in a plethora of decks. Or it may be somewhat niche but incredibly strong in certain archertypes.
THE REVIEWS:
Sensors are Placed: 6.5 out of 15 possible points.
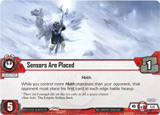
CobraBubbles (2/5) – Man, these Defenders make the Wilderness Fighters from last pack look awful. As defensive units go, the tactics makes them much better, and they’re cheaper too. They don’t seem very well trained though - from their expressions and their attitudes to gun safety I’d have sooner guessed they were kicking down the doors of Hoth Bank and declaring a hold-up than defending the noble Rebel cause.
I’ve always found the Kenobi effect of revealing your opponents edge cards to be stronger than it looks, and having it on this objective is especially convenient given that the Defenders’ icons are all white. The Shield Generator also makes an interesting contribution to the set’s edge potential, as it’s not only a 3-pipper, but one that returns to hand for edge use after you’ve used its effect. Neat design space.
Perhaps ironically, this set is definitely a better choice for the Hoth defense archetype than Echo Base Defense. But it isn’t good enough on it’s own to make that strategy actually viable. Maybe you slow the Dark Side down, but inevitability is on their side, so a set that can’t contribute to your win condition at all is hard to play.
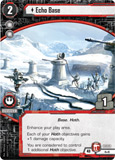
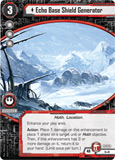
BakaMatt (2.5/5) – Another odd defensive styled set for Rebels. They received a lot of these in Hoth, reducing the usefulness of many of their pods. I've said it many times before about similar styled sets, but the light side wants to be on the offensive. They can't win a race against the dial and have to take out objectives. Every slot of your deck devoted to defense in one less tool to help achieve victory. Echo defenders are weak chuds even with the bonus icon. The shield generator sports nice pips and is reusable, but the effect is slow for the cost. Echo base carries an effect more suited for the dark side. The extra Hoth objective would be more valuable if not for the fact that Hoth objectives aren't heavily played by most players and thus isn't usually in contention. First Marker is also an effect that is pretty meh for rebels.
Majestaat (2/5) – Good on paper because Hoth synergy can give you a lot of value out of the cards here. But in practice, you'll soon notice this set isn't really doing anything to help you win the game. And that's the problem with Hoth characters: they can't win. And once you try to fit in speeders or anything else, you start losing synergy and are better playing something else. If you actually had options to run a viable Hoth character deck, I think this could be a decent 1x.
The objective, units and Echo Base are alright. Echo Base Generator is, unfortunately, a tad too expensive. Make it 2 cost with the capacity to provide up to 2 shields instead of 3 and it would be much better because it wouldn't mess so much with your economy. First Maker is hit or miss, so it should have had a second pip, if not be something else altogether. A main with blast or any enhancement/event to put some pressure on the DS while playing defensive would have helped a ton.
Renegade Squadron Mobilization: 12.5 out of 15 possible points.
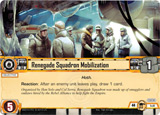
CobraBubbles (4/5) – Huh. Funny how the Hoth set that doesn’t do anything with the Hoth trait is far better than its synergy-heavy Sensor-placing sibling. In the Operative and the Expert we see what good defensive support units should look like - cheap black guns, no messing about.
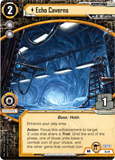
Of course, the standout here is Echo Caverns, arguably the most powerful icon manipulation card in the game. The conflict system in our beloved LCG is so finely balanced that moving 1 icon of any type can mean deciding the fate of multiple units and/or an objective - it can even decide a match in the right circumstances. But the applications are potentially endless, and figuring out the best use of your Caverns each turn is very skill-intensive. It’s always a blast to play with - except when it’s a tactics or a gun to play with HAHAHAHAHA.
Add that to a pretty beastly main (5 health!), card draw from the objective and free damage in the Target, and you have yourself a tasty little set. I think it’s unfairly overlooked at the moment, given the prevalence of Spark decks - Mobilization gets you 2 solid Spark targets and an enhancement that makes all those units you’re pulling out your arse in the conflict phase that much better. It’s neat in Cracken too. If you’ve not played with it in a while, try it out, you’ll enjoy it.
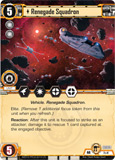
BakaMatt (4/5) – Here's one of the few rare Hoth gems. Echo Caverns is the star of the show, allowing you to strip an icon from your own or opponent's units and add it to your own. It helps take some bite from a heavier enemy or in a pinch lets you double up on an icon after you've made a strike with a unit. Renegade Squadron is an expensive but worthy unit that works fine with stats alone, but comes in extra handy against capture Scum or in the light side rescue archetype. The objective also puts in some great work, granting a free draw everytime an enemy unit leaves play. It pairs great with bounce effects like Swindled, but also just from naturally destroying units over the course of the game. Target of Opportunity is one of the betters fate effects for light side and helps prop up the pip count. Munitions Expert is a neat little unit that lets you add unit damage at action speed, allowing you to increase your threaten range with other attackers and complicate combat math a little. The only real dud in the set is the Renegade Squadron Operative, but even he isn't that terrible. Was a great set at release, and still good today, although maybe just as a one-off due to Squadron's heavy investment and Caverns being unique.
Majestaat (4.5/5) – One of the best pods in the Hoth Cycle, plain and simple, being very good even by today standards. Ironically, it doesn't give a damn about the Hoth trait and its synergies, which is exactly why it's so good. You can fit it in about any deck and it'll perform well. The objective is a decently reliable draw engine. You can build around it with units that have targeted strike. Add in No Match for a Good Blaster to get some extra punch, and then, the Munitions Expert becomes substantially better. He's an incredible support unit, very cheap and efficient, allowing most of your units to one-shot similarly costed opponents. Also, cheap bodies are really useful to deal with Dark Lord of the Sith, so there's that. Renegade Squadron Operative is a dream chud for DS. Not so much for LS, but he can be fairly annoying when your opponent is trying to sneak in cheap blast or tactics. If you have the Expert in play as well, even enemy mains will think it twice before getting in his way.
Renegade Squadron is one fat main that does a bit of everything, and it sports two tactics, which is pretty rare to come by. It's reaction is situational, but very effective in the correct matchups, and it seems Sith and Navy will be getting some capture in the Alliances Cycle, so it'll become even better. Only downside (sadly, a big one) is the lack of a third pip, because it can't contest the Force even against units that are MUCH cheaper.
Next is Echo Caverns, which I believe is still one of the most overpowered cards in the game, but it does have a rather high skill ceiling. Between that, the tempo hit for playing it and the need for units that will actually make use of it, you have enough variables to keep it in check. It messes heavily with combat math, makes the enemy weaker while making yourself stronger. Also provides a resource if you're desperate.
We get a Target of Opportunity to wrap the pod and give it a bit more offensive punch, making this a very well-rounded set. Honestly, I'm always running at least one copy of it in my Smuggler builds, and it works wonders, though I'll admit the Squadron often feels too slow. As said, you can't afford to pay that much and not even get to control the Force for a turn.
Preparation for Battle: 10 out of 15 possible points.

CobraBubbles (3/5) – Wow. That’s serious dedication to a theme. Four, count em, four cards that provide shields, with an objective that gives pretty significant buffs to shielded units and a resource to tie it all together make this a pretty nifty support set. Sure, if you’re not interested in shields you probably don’t want this, but unlike a lot of other heavily-pigeonholed sets the power level is pretty good too. That first line of text on the objective is insane - when it’s active, your opponent can’t stop a shielded main from striking unless they have multiple tactics/focus effects. White tactics and two icons make the Tanks neat chuds even if you never trigger their keyword. And action-speed shields are exponentially more flexible (and therefore more powerful) than Shielding shields, so the event and even the Scout can swing an engagement for you.
A quick aside - the Hoth Scout got me thinking about the representation of women in this game. I was wondering how many of the generic unnamed characters are women, so I went back and had a look, and even just in the sets we’ve looked at in this series so far there’s a high proportion, which is great to see. Representation is especially important in the male-dominated world of tabletop, so props to FFG for that. The game remains very white, but that’s a discussion for another time.
Back to the set - I reckon it may be worth your time even now in a main-heavy deck, to help prevent the Dark Side from messing up your homies. Probably never a 2x though.
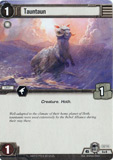
BakaMatt (3.5/5) – This is a very interesting design that I hope we see again in the future. The Preparation for Battle objective has a different bonus depending on the stage of the game. Early game it enables chip damage as you gather your units and then late game gives you blast to close things out. By virtue of being two-cost speeders with higher health than the standard speeder, AAC-1 Speeder tanks turn out to be welcome units to run interference for heavier hitting Rogue speeders and any other units you may have mixed in and synergize well with the rest of the speeder package. The tauntaun resource is less stable than an enhancement would have been, falling to Moment of Triumph, pings, or the odd targeted stike, but is still a welcome addition of a resource here. Shelter from the Storm is odd here in what is essentially a vehicle build, but it sports two icons, so isn't terrible to pitch to edge.
Majestaat (3.5/5) – This set dominated LS tournaments lists for a time. Like Renegade Squad Mobilization, it doesn't give a damn about Hoth, which is one of the reasons it saw so much play. The other reason being it's pretty darn good.
The objective isn't as good as it used to because it's way easier to pack a lot of tactics nowadays, but it still makes you units very resilient provided you have enough shields, which this set makes sure you'll have. Later on, it grants black blast. Needless to say how incredibly good that is for LS.
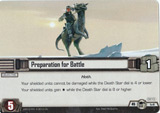
Next you have a Tauntaun, the single best card in the whole universe... if it's not getting choked, focused, Triumph'ed, etc. But seriously, a 1-1 non-limited resource is pretty good. I only find it strange that it doesn't have an in-built ability to sacrifice itself. I mean, what do you remember when thinking Tauntauns? Of course, a bed made out of Tauntaun guts.
The rest is a bunch of shield-tech, just want you would want for the objective. The speeder tanks may lack the black gun of other 2-drops, but they have an extra pip and shielding, so they more than make up for it. They're a great addition for Speeder decks, if you want to have some more control tools, and they're insanely annoying if Hoth Ops is out.
Hoth Scout and Shelter from the Storm are more situational, but they're shields at action speed. With the objective out, that's enough to keep your opponent on his heels.
An easy 1x in speeder or shield-heavy builds. Good enough to be ran as 2x, but do note you may be lacking in raw firepower if you do so.
Deploy the Fleet: 10.5 out of 15 possible points.
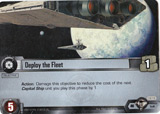
CobraBubbles (3/5) – Next, the first restricted objective we’ve covered in this series. Remember to check your FAQs, kids!
Deploy kinda gives the lie to what I’ve been saying about Dark side not being aggressive early in the game’s life - this is as aggro as it gets. BUT, before I discredit myself too much, Navy just didn’t have the infrastructure to support such all-out aggression at this early point in the game. The nature of the Death Star dial mechanic means Dark aggro can almost never outpace Light aggro, so you have to have defensive backup - for every DSSD or Chimaera you’re attacking with you need a Golan or, err, a Chimaera to defend with. It was a long time before Navy got anywhere close to a good number of efficient defensive units, so the strategy that this pod was designed for was always very high risk.
To be fair, that can still be a valid and fun way to play the game, and busting out big huge smashy Star Destroyers feels awesome, so I still have a soft spot for this set, one dimensional as it is. Just a shame they nerfed the DSSD-Doole-Forward Command Post combo.
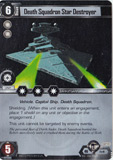
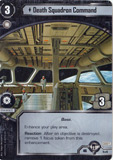
BakaMatt (3.5/5) – The star destroyers can land some heavy punches and shielding with event immunity makes them support units on defense in a pinch. This objective can cause some insane ramp between the objective action, Admiral's Orders and Death Squadron Command, churning out early capitals. This was super abusive when paired with Enforced Loyalty before the set restriction, and while it sees less play because of how insane Loyalty is, Deploy the Fleet is still a variety option for beefing up a capital ship build.
Majestaat (4/5) – This set knows what it wants to do and it does it very well. Ramp and play big rigs to steamroll your opponent. Laser-focused!
Although risky, the objective allows you to get a potent board early on. And it's not even that risky thanks to the likes of Tarkin Doctrine and Entrenched Defense. It will come to bite you sooner or later, however, so make use the investment pays off and you can close the game ASAP.
For that, you'll need to play the Death Squadron Star Destroyers. These things are nigh unstoppable and don't care about edge at all. Add in some obvious support like Might of the Empire and/or Forward Command Posts and they become all the more annoying.
It's a very good thing this and Enforced Loyalty got restricted, as this not only dealt with a truly abusive deck, but also opened more deckbuilding choices for Navy. Loyalty for a true Fortress, control-oriented build; Deploy the Fleet for an aggressive approach.
Like with Technological Terror, most of this set is geared towards ramping and discounting to play the very expensive units here. They all do their work pretty well at that, and I can't see any real complaints on them.
You can run this as a 2x if you're a true aggro master, but do note that even if you can afford them, the Death Squad Star Destroyers are very poor T1 plays, meaning you don't want 4x of them in your deck.
Jabba's Orders: 9 out of 15 possible points.
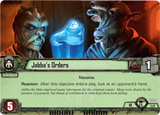
CobraBubbles (3/5) – Capture is a very nuanced mechanic, and even though it was just the second Scum set ever released, Jabba’s Orders started to reveal some of those nuances and use capture in very interesting ways. Get Me Solo in particular brings to light that it’s that much easier to capture something you had captured already earlier, which isn’t immediately obvious when you first learn about capture.
On top of that, there are just some damn efficient cards here. The Weequays and the Palace kicked off the main strategy that Scum played to right through the first couple cycles: turtle the **** up and wait until you win. It was always tough to actually hold out until the dial hit 12, but that was probably a good thing since when it works Scum fortress is super obnoxious (see e.g. the Jabba’s Reach Prison combo deck I described in my review of that pod a few articles back, which this pod featured in too). I think this is still a solid pick for modern Scum decks that are playing capture tech, even though the Crawler is a strong candidate for worst card in the game. Dem Weequays be real good, yo.
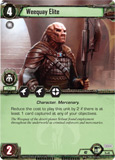
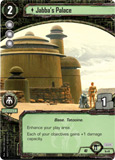
BakaMatt (3/5) – The Weequay are great when discounted and not so hot at full cost, so this pairs best with capturing, ideally with Tatooine Crash or Slave Trade to turn them on very early and easily. Jabba's Palace shows how a card that can be mediocre for one side of the force can be great for the other. With Echo Base, the best side benefit Rebels were entreated to was guaranteeing control of Hoth. The dark side benefits much more from the increased damage capacity. Just deploying this card is enough to set your opponent back by a pseudo amount of 3 blast. It's unique, but if you draw your second copy, it still has good pip value. Get Me Solo is a deceptively powerful card. Even if you simply drop it to look at the opponent's hand, that can be worth it. Verify how many pips your opponent can toss before engagement, or whether or not they're holding a twist. Have a look at what their next turn's plan is going to be before making your own deployments. If you manage to snag a unit, that's just gravy. The objective reaction is decidely less useful, despite providing similar opportunities. The difference is timing. Orders will often flip at the start of the game, which is less useful than being able to choose when to have a peek. Nothing excuses the Jawa Trading Crawler, which badly weighs this set down.
Majestaat (3/5) – Would like to give this a higher rating because it can be quite good, but it does need a dedicated deck, and even then some of the cards here aren't particularly powerful.
Starting with the objective, it gives you nice intel on your opponent's hand, but it does absolutely nothing afterwards, and it only has regular stats. Scum has far better options.
Get Me Solo is about the only card in the game that can make such good use of that knowledge, making for very cheap capture of your opponent's best... future play. Without the objective, it becomes quite unreliable, though it has okay edge. Or you could call out for Yoda if you can spare the resource. Does work to deal with looping annoyances like the Falcon, provided they're still in your opponent's hand by your turn. If anything, you can look at his hand in preparation for an edge battle. Events and Fate cards aren't quite as poweful when you're expecting them.
Things start getting spicy with the Weequay Elites. Ideally, you're paying just two to get 3 black icons, tactics included, giving you a very impressive defender. You'll need early capture for that to work, so you may want to run the likes of Tatooine Crash or Slave Trade, which in turn will allow to build an unholy wall of tactics. Problem is when you have to pay their full price. Sure, they still have main-level combat icons, but at two health, they actually care about edge, because if they lose, they're likely being killed in a single enemy strike, even against cheaper units. Furthermore, a single force icon makes them terribad at the Force Struggle.
I like simple things. Jabba's Palace is a simple, insane thing. An affiliated resource that gives +1 damage capacity to all your objectives, not caring about affiliation or silly capture things to gain the buff. What's more, it has 3 pips to boost your edge should you come upon a second copy of it.
All in all an average set that can shine if you consistently get the discount on the Weequays right from the beginning of the game. But that may also mean you're purposedly picking below average cards just to make them work.
And no, I'm not forgetting the Jawa Trading Crawler. That's not a card.
FINAL WORDS:
Took a few days longer than I wanted. Totally on me this time. Friends getting married, bank f***** me up and other issues have left me with less time than I'd want.
But nobody cares about that, so on to the pack! The Rebel pod received the worst rating, and it's the only Hoth-reliant pod. Figures.
Most others need some deckbuilding, but are still perfectly playable, while Renegade Squad Mobilization a little slow but still all around very good, with tons of utility.
So was the Hoth Cycle really that bad? To be fair, this might be the best pack in it, and as you may have seen, there's nothing absolutely stellar.
Don't be surprised if scores start dropping in our next issue.
A Dark Time is next. As most of these articles, that shouldn't take too long, hopefully.
Nothing on the Alliances Cycle yet, so the members of the Mos Eisley Mafia are taking it easy and keeping up with life.
And that's it this time. I extend my gratitude to the review team and the readers who motivated us to do this. I'm sure there's room for improvement. If you got any ideas, feel free to comment or PM me so we can make the next article even better.
I must say, however, that there's a limit to how many images can be uploaded. That's why I only selected a few images per pod.
If you're looking for more reviews, you can find them in our forum thread here.
May the Force be with you all!
- Rio, 4wallz and Thaliak like this


2 Comments
Preparation for Battle is an attractive option when Running the Trench.